Part 1. Why GPT‑4o and Vidu?
Among the many AI tools, why do we recommend the combination of "GPT‑4o (a type of image generation AI)" and "Vidu" this time? There is a good reason for that.
- Strengths of GPT‑4o (image generation AI): First, it can create consistent characters and beautiful backgrounds depending on the prompts. The appeal is that generating images of the same character with various expressions and poses is easy. It will make your wish of "I want to see this scene with this character!" come true.
- Vidu's strengths: Vidu is also good at generating videos from images! In particular, the "Image to Video" function that we will use this time adds natural movement to a single uploaded image as if by magic. What's more, Vidu is also very good at anime-style expression!
- Benefits of collaboration: If you create a character image with a stable design in GPT‑4o and load it into Vidu to animate it, you can achieve "high-quality character animation with stable drawing" without specialized skills and in a short time! It's the strongest tag team!
Part 2. List of Things to Prepare
Now, let's check what you have before creating the animation!
- Image generation AI account: This time, we will use GPT‑4o, but you can use your favorite image generation AI, such as Midjourney or Stable Diffusion. As long as you can create character images, you'll be fine!
- Vidu account: If you don't have one yet, register for free! You can try it out even with the free plan.
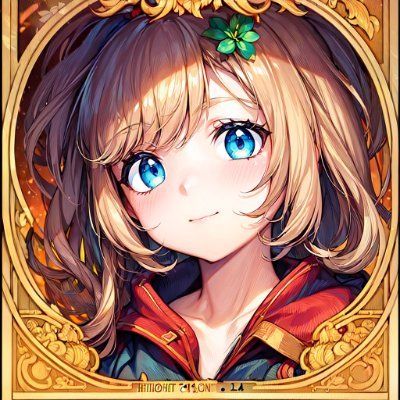
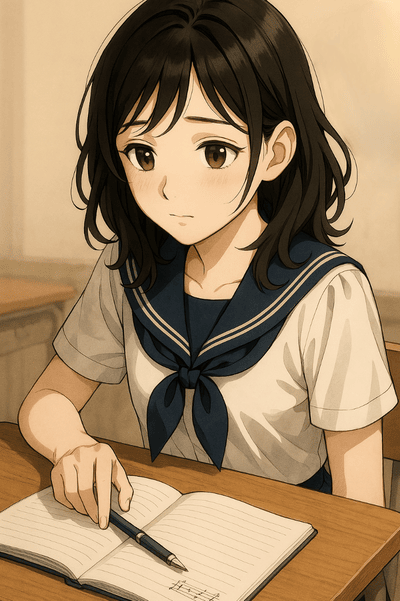
- Character image you want to move: This is the main character! This time, we will use the images of high school girls and boys provided, but of course, please prepare your own favorite images you have generated. (JPEG or PNG format is recommended)
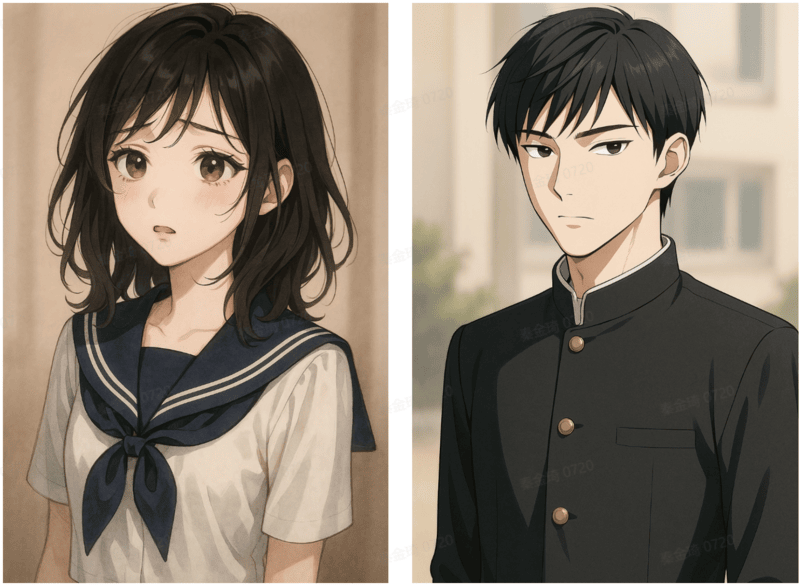
The characters we will use are these two! Are you ready? Then, it's time to start production!
Part 3. From GPT‑4o to Vidu: A Magical Workflow
From here, we will explain the steps from generating character images with GPT‑4o (AI) to animation with Vidu.
Step 1: Create the main character with GPT‑4o - Character image generation
First, generate a character image that will be the story's main character.
- Prompt skills: To maintain consistency, it is a good idea to describe the characteristics of the character in specific and detailed terms, such as "high school girl, blue sailor uniform, long black hair, gentle smile, anime style, high quality". When specifying the background, clarify the situation, such as "by the window in the classroom, afternoon light".
- Example prompt (high school girl)
- Anime style illustration of a Japanese high school girl, long black hair, blue sailor uniform, gentle smile, standing by a classroom window, afternoon light, masterpiece, best quality
- Example prompt (high school boy)
- Anime style illustration of a Japanese high school boy, short brown hair, black school uniform (Gakuran), slightly cool expression, leaning against a brick wall outdoors, cinematic lighting, masterpiece, best quality
- Example prompt (high school girl)
This time, I tried the following style.
「Japanese Anime and Korean webtoon manhwa Mix style」
- Variation generation: If you generate images of the same character with different poses and expressions, such as "slightly surprised expression" and "profile", you can expand the range of expression when you connect the videos later.
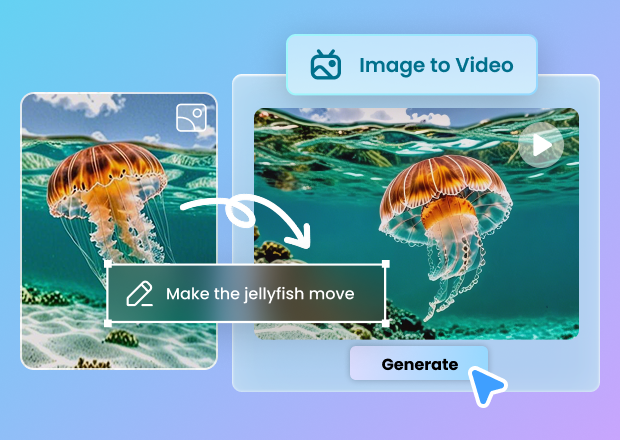
Step 2: Go to Vidu! Upload images
Once you have your favorite character image, it's time to use Vidu!
- Log in to Vidu AI Video Generator, click the Try Vidu button, and select "Image to Video" from the dashboard.
- Make sure you are in "Image to Video" mode.
- Drag and drop the character image you just created into the "Upload Image" area, or click and select the file.
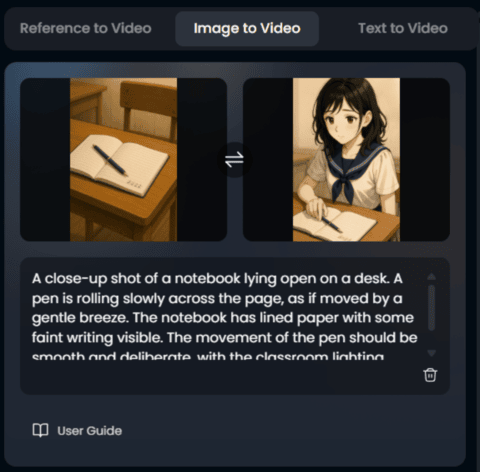
Step 3: The spell that brings it to life! Enter the movement prompt
Once the image is uploaded, the next step is to tell the AI how you want it to move using a "spell (prompt)".
- Prompt input field: Enter the movement instructions in English in the prompt input field below (or next to) the image. (You can also try Japanese, but English is often more accurate.)
- Example of movement prompt:
Describe specifically what kind of movement you want to add to the original image. For example, you could extract and instruct the movement part from a prompt that contains a detailed scene description like the one below.
A close-up shot of a notebook lying open on a desk. A pen is rolling slowly across the page, as if moved by a gentle breeze. The notebook has lined paper with some faint writing visible. The movement of the pen should be smooth and deliberate, with the classroom lighting creating subtle shadows as it rolls.
Explanation:
This prompt describes a scene of a close-up shot of a notebook lying open on a desk with a pen rolling slowly across the page.
When adding movement to an image of a notebook and pen created with GPT‑4o or similar using the Image to Video function, the part "A pen is rolling slowly across the page" is the core of the movement instructions given to the AI. Expressions such as "gentle breeze," "smooth and deliberate," and "subtle shadows" are also useful for conveying the nuances and atmosphere of the movement.
- Tip: When using the Image to Video function, it is important to be aware of adding a little movement to the elements of the original image. Even when using a prompt that describes the entire scene, as in the example above, the AI mainly refers to the parts related to "movement". It is recommended to start by simply specifying the object you want to move and the specific movement in a short way, such as "pen rolling slowly".
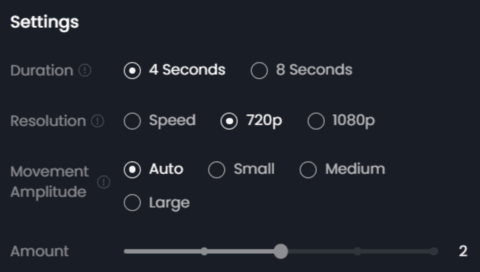
Step 4: Fine-tune and activate the magic! Advanced settings and video generation
After entering the prompt, the final step is to go to the advanced settings. This is where you adjust the video's quality and the movement's nuances.
- Duration: Select the video length to be generated from "4 Seconds" or "8 Seconds". It is recommended to start with a short 4 seconds to check the movement.
- Resolution: Select the image quality of the video.
- Speed: Generates the fastest, but has lower image quality. Suitable for previewing the movement and test generation.
- 720p: Standard image quality. Well-balanced and suitable for many uses.
- 1080p: High quality, but takes longer to generate and consumes more credits. Select this for the final output or when a more detailed expression is required.
- Tip: First generate with "Speed" or "720p", and then regenerate with "1080p" once you are satisfied with the movement, to use credits efficiently.
- Movement Amplitude: Select the strength of the movement to add to the image from "Auto", "Small", "Medium", or "Large".
- In the previous example of "rolling a pen", "Small" is a very subtle, slow rolling, delicate movement, "Medium" is a natural rolling movement, and "Large" is a clear, large rolling movement. With "Auto", Vidu will try to determine the optimal movement size from the image and prompt.
- Tip: The appropriate size depends on the original image and prompt, but we recommend trying "Medium" or "Small". "Large" may cause unintended image distortion, so choose carefully.
- Amount (number of generations): Select how many video variations to create with one generation command, between 1 and 4. For example, if you select "4", four different movement patterns will be generated with the same settings, and you can choose the one that best matches your image. This is useful when you want to compare various movement possibilities.
Once you've decided on all the settings, click the "Create" button! Wait for the AI to interpret your instructions and start generating the video. (The generation time may take a few seconds or more, depending on your selected resolution and amount.)When the generation is complete, videos will be displayed for the specified amount. Play each video to check the movement and download the one you like best!
Part 4. Comparing the results: Prompts and settings can make a big difference!
Even with the same image, the end result can change quite a bit just by changing the prompts and Motion Strength settings.
- Successful example: A single tear forms and slowly rolls down her cheek (A tear rolls down her cheek) + Motion Strength (Auto) → Natural and delicate movement!
https://www.vidu.com/share/2715807202530159/587120
- A slightly disappointing example: A scene where the camera follows the movement of a red string tied to a pinky finger → Sometimes the red string breaks in the middle...
https://www.vidu.com/share/2718662422451669/877461
The fun part is trying different things and finding the movement that suits your image!
Part 5. Make it even more attractive! Tips and tricks
Here are some tips to make the GPT‑4o and Vidu integration even more fun.
- [GPT‑4o side] Maintain character consistency at all costs:
- Detailed prompt: As mentioned above, specify the clothing, hairstyle, eye color, etc., specifically, and include them in the same prompt every time.
- Fixed seed value: If possible, generating images using the same seed value makes stabilizing the face and style easier. (Depending on the AI tool)
- Reference image: It is also effective to use the first generated image as a reference for the next image generation (Image Prompt, --cref, etc., depending on the tool).
- [Vidu side] Aim for natural "additional" animation:
- Don't be too greedy: Image to Video is merely a function to "add movement to an image." Text to Video mode is better at overly complicated movements. First, try subtle movements such as "blinking," "hair swaying," and "smiling."
- Keep the Motion Strength low: We recommend starting with "weak to medium" and gradually adjusting.
- Keep the background simple: If you want to make a character stand out, it is often more effective to leave the background as a still image. It is difficult to make the background still on the Vidu side, so there is an advanced technique of simplifying the background when generating it with GPT‑4o, or generating the character and background separately and combining them later.
- Add a worldview to the prompt:
- It is not essential, but adding anime-style movement or keywords that match the scene (e.g., romantic scene, school life) to the movement prompt may help the AI understand the context better and get closer to the intended atmosphere. (The effect is unknown, but it's worth a try!)
- Save wisely! Credit tips:
- You need credits to generate videos with Vidu (you can get them even with the free plan!). Instead of generating videos with high quality and long duration, we recommend that you first try several patterns with standard quality and short duration, and when you find one that suits you, generate it for real.
Part 6. FAQ (Answers to everyone's questions)
Here, we will answer some frequently asked questions about the GPT‑4o x Vidu collaboration!
Q1: Can I use images created with something other than GPT‑4o (such as Midjourney or Stable Diffusion)?
Of course! As long as the image file is in JPEG or PNG format, you can use Vidu's Image to Video function to animate any image generated by any AI tool, or even illustrations you have drawn yourself. Be careful of copyrights.
Q2: Can I make a longer animated video?
Currently, Vidu's Image to Video can generate short videos of about a few seconds at a time. If you want to make a long video, we recommend that you generate several short videos (scenes with different expressions and movements) with Vidu and then connect them together with video editing software (AviUtl or DaVinci Resolve for PC, CapCut for smartphone apps, and many other free programs!).
Q3: Can I change the character's orientation or put it in a different pose?
Vidu's Image to Video function basically adds a little movement to the uploaded image. You cannot significantly change the character's orientation or make a seated character stand up. If you want a video with a different orientation or pose, you need to generate a new original image with GPT‑4o (or another image generation AI) in that orientation and pose, and then load it into Vidu.
Q4: I want to improve the quality of the generated video!
Vidu has a function to set the resolution, but no upscaling function. You will need to upscale it separately with another tool. Also, the higher the resolution of the original image itself, the better the result tends to be. Summary